Art is huge in our household. All of us, in some form or another, love using our creativity to draw, paint, or do something artsy. March is Youth Art Month which makes it a great time to dedicate to celebrating creativity in your homeschool.
Art can easily become the subject we mean to prioritize but don’t. Between math lessons, reading time, and laundry, art quietly slips into “maybe next week.” The good news is that art doesn’t have to be complicated. It can be simple and fun. I’m going to share with you easy ways to do art in your home that’s realistic and will help your kids use their God given creativity.

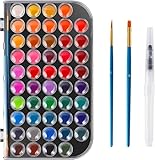
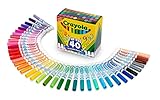
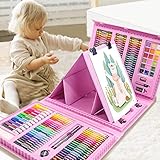
Keep It Simple with a Weekly Art Basket
You don’t need a full craft room (even though I would LOVE to have one). So instead, I make sure that I make supplies easily assessable with a small “art basket” or make a space on our homeschool bookshelf with:


Tie Art to What You’re Already Studying
Art doesn’t have to be separate from academics. Studying dinosaurs? Draw and label a T-Rex. Reading about missionaries? Create a watercolor map of the region. Learning about spring plants? Sketch flowers from your yard. When art connects to your subjects, it reinforces learning while nurturing creativity.


Follow Video Tutorials
If you feel unsure about teaching art, there are so many options available like YouTube videos, DVDs and even online classes. These short, guided videos can be incredibly helpful to help provide structure to your art endeavors.
Pick one day a week and follow a step-by-step tutorial together. You’ll be surprised how much confidence grows when children learn basic techniques.
Here are some of my favorite options for video tutorials:
- Art For Kids Hub
- ARTistic Pursuits Watercolor Pencils
- ARTistic Pursuits Art For Children Volume 1
- Master Books: Observation and Drawing Fundamentals
- Master Books: Art For The High School Student
Embrace Open-Ended Creation
Some of the best art happens without instructions. When you make supplies easily assessable, your kids will have the freedom to do art at anytime (within reason of course!). If you want more structure, choose one day a week and call it “Art & Music Time.” Put on your favorite music and let everyone create! Consistency matters more than formal lessons.


Use Nature as Your Art Curriculum
Spring is the perfect time for this.
Go outside with:
-
Clipboards
-
Sketchbooks
-
Pencils
Observe:
-
Budding trees
-
Birds
-
Clouds
-
New blooms
Nature study and art work beautifully together in a homeschool rhythm.
Celebrate Youth Art Month Intentionally
Since March is Youth Art Month, consider:
-
Hosting a simple “family art show” at home
-
Displaying artwork on a dedicated wall
-
Inviting grandparents over for an art viewing
-
Letting each child explain their favorite piece
Children light up when their creativity is noticed and valued. Celebration builds confidence!


![[2-Pack] Kids Art Frames, 8.5x11 Front Opening Kids Artwork Frames Changeable, White Artwork Display Storage Frame for Wall, Holds 50 Pcs, for 3D Picture, Crafts, Hanging Art, Portfolio](https://m.media-amazon.com/images/I/51TPjAHM-0L._SL160_.jpg)

But What Do You Do With All the Artwork?
Now let’s talk about the real struggle. What do you do with the stacks of drawings? Let’s be honest mama, it’s hard to throw away such cuteness! From the watercolor experiments, to the construction paper masterpieces, to the dozens of sketchbook pages.

I have PILES of art work that spans 10 years (not including what’s on my spare fridge!) and I haven’t done anything with it because I want to cherish these memories.
But if I’m honest, I can’t realistically store every single piece. I can spend the time scanning and autographing each piece myself and then send it off to be printed in a book. Or, I can outsource that hard work to a service like Artkive. This can be an incredibly helpful resource because Artkive allows you to:
-
Send in your child’s artwork
-
Have it professionally photographed
-
Turn it into a high-quality keepsake book
Instead of boxes overflowing in closets, you get a beautifully bound book preserving your child’s creativity.
It’s an easy way to:
-
Reduce clutter
-
Preserve memories
-
Honor your child’s hard work
I recently put together an Artkive box and the process was amazing and simple.

The box was filled with everything you need to pack your art, choose your items and a return UPS postage sticker.

I ordered one book for each of the kids. I had them choose a few of their favorite art pieces and I chose the rest. I organized them in separate stacks and then placed it in the box, sealed it, and took it to UPS to ship it.

Once they receive the box they will start the process and send you a gallery with all of the art photos. From there you will organize it into a book.

They keep you informed everything step of the way so you know what to expect. The books came back amazing! The kids love it and I do too!

With Artkive, you no longer have to balance stewardship with sentiment because it provides a practical solution. Get $20 off your Artkive box using THIS LINK!
Share Your Easy Ways To Do Art
I’d love to hear your favorite ways in the comments below!

Homegrown Motherhood is dedicated to recommending quality resources to benefit Christian families. This blog contains and is monetized through ads, sponsored posts and affiliate links. For more information, please read our Privacy Policy